
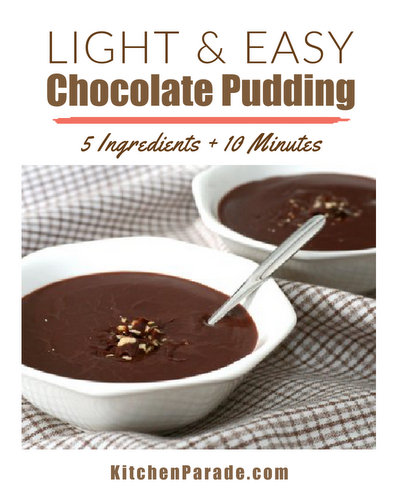
| Our Daily Bread: My Easy Everyday Bread Recipe |  |
The Recipe: My bread recipe, the one I've made again and again for exactly one year. It's an easy bread to make often, to fit into small spaces of your cooking life.
The Conversation: How I accidentally came to make European-style bread every few days for the past year.

It's a special day here today, March 31st.
First, DarkEarly this morning, we were visited by a pair of wild mallards, their bright orange feet announcing their northward migration back to Canada for the summer. Mama was sooo hungry, pecking at the ground below the bird feeders, Papa kept watch. Every so often, she'd lead the way across the pool cover for a drink, then back to the feeders for another course. They're gone now. Safe travels, visitors!

But more than that, today is my mother's birthday. Were she still alive, her birthday cake's 87 candles would light up a room!
And today it's been one year and two days since my now 91-year old father came to live with Jerry and me here in St. Louis.
On Dad's second day here twelve months ago, we were still settling in, figuring out how it would all work. And because it was Mom's birthday, I made bread.

FOOD AS TRIBUTE You see, I've taken to remembering people who've passed on by cooking something they liked on their birthdays. It's a quiet tradition I've quite come to like, a private way to pay homage. My mom was a master bread maker, starting when she was a 35-year old married mom of two with Stage IV breast cancer. Kneading bread helped restore her muscles after a radical mastectomy and many rounds of radiation. (story here)
And Dad looooved Mom's bread. After her death, he became celebrated in certain dinner circles as the widower who would arrive with just-baked bread in hand, the product of a bread maker gifted by my sister and her husband.
OUR DAILY BREAD The thing is? That single year-ago loaf turned into another and another and another and then another – dozens and dozens of fresh loaves of homemade bread, my own "loaves and fishes" story minus, well, the fish.
Mine is a simple, European-style rustic bread. The crust is soft, the crumb is dense. It's about 25% whole grain with great texture thanks to generous spoonsful nuts and seeds and germs. For the first few months, I played with combinations of flours and add-ins. In the last few months, I settled into a favorite combination of oats, sunflower seeds, wheat germ, flax seeds and ground flax, a blend I turn in over and over again.
My bread makes excellent toast. It's great for sandwiches, especially open-faced sandwiches. It's heavenly still warm from the oven but holds up for a week without trouble. When someone visits, I hand over a warm loaf to take home. When the bread's gone, I make another batch.
We seem to never tire of it. It's Our Daily Bread.
MY EASY EVERYDAY BREAD
Time to table: About 4 hours (easily longer with a slow rise if that suits better)
Makes 2 1-pound loaves
-
YEAST MIXTURE
- 1 cup hot water
- 1 cup cold milk
- 1/4 cup (50g) brown sugar (see TIPS)
- 2-1/4 teaspoons active dry yeast (or any other yeast)
-
FLOURS
- 3 cups (375g) unbleached bread flour
- 1 cup (125g) unbleached whole-wheat flour
- 2 teaspoons table salt (no skipping or skimping!)
- 1 cup "add-ins," a mix of oats, seeds, nuts and germs (see TIPS)
-
EXTRAS
- Oil, for bowl
- Additional flour, maybe a couple of tablespoons, for kneading (see TIPS)
- Oil, for top crust, optional
YEAST MIXTURE In a medium size bowl, stir together the hot water, milk and brown sugar; the combined liquid should be "tepid" in temperature – not hot, not cold but warm on the inside of your wrist, just like a baby's bottle. Sprinkle the yeast over top, then gently stir in. Set the bowl aside to let the yeast activate while you're gathering the Flours, it should noticeably come together, it might well even begin to bubble and grow!
FLOURS In another medium size bowl, gather the flours, salt and add-ins. Stir together, then place about a half cup of the Flours onto the surface where you'll knead the bread. (See TIPS.)
COMBINE Pour the Flours over the Yeast Mixture, use a spoon to roughly combine, wetting all the flour. Before getting your hands into the dough, pour about a tablespoon of oil into the bowl that held the Flours, you'll use this bowl for the dough's First Rise.
KNEAD Dump the dough onto the 1/2 cup of Flours on the kneading surface. Dust your hands with a little flour, then knead the bread until dough becomes full and even, I set the timer for five minutes, that's nearly always perfect, but also some times go longer, a full ten minutes. If you have a bench knife, every so often, you might want to use it to scrape the dough off the kneading surface. Dust the surface with a little additional flour as needed but with a good kneading technique (see TIPS), it won't be much.
ROLL IN OIL After kneading, shape the dough into a ball, then stretch the dough from the top over its sides to form a seam on the bottom side. Roll the top side of the dough ball in the oiled bowl, turn the dough in the bowl, wetting each side with oil. Cover the bowl loosely with a clean kitchen towel. Now pick one, either a Fast or Slow First Rise.
FIRST RISE (FAST) Place the bowl in a warm place and give it a couple of hours to rise, the dough will rise to the top of the bowl. The warmer the room, the faster the rise; the cooler the room, the slower.
FIRST RISE (SLOW) This bread rises beautifully in the refrigerator for 8 or more hours. Such flexibility! You could mix it after supper, let it rise overnight and then bake in the morning. Or you could mix it in the morning, let it rise during the day and then bake it after work.
DEFLATE Once the dough has risen, use a clenched fist to gently deflate the dough. (Some people call this "punching" down the dough but punches are way too violent, this bread is your friend!)
SHAPE For rustic, free-form loaves, cut the dough in half and form into two loaves, round or rectangular; place the loaves on a parchment-lined baking sheet leaving lots of room between. For more traditional loaves, form dough into two rectangles and arrange in well-greased or sprayed loaf pans. Cover with the same clean kitchen towel.
SECOND RISE Place the baking sheet or loaf pans in a warm place for about an hour (longer if you the dough started off cold from a slow First Rise) until the bread rises again, making full, fat loaves.
BAKE About 30 minutes before the Second Rise will finish, heat oven to 350F/180C. Bake loaves for 25 - 35 minutes, in my oven, 30 minutes is spot-on perfect.
COOL ON A BAKING RACK Immediately turn the loaves onto baking racks, otherwise they'll get soggy on the bottom. If you like, drizzle a tiny bit of oil onto a silicone brush and brush the hot loaf tops with oil. Let cool for at least ten minute before cutting. Slice with a serrated bread knife.
FREEZER My Easy Everyday Bread keeps for a good week but two loaves will be a lot for some families. First choice: gift a loaf of fresh bread, it'll be much appreciated! But this bread freezes well, either in a whole loaf or sliced. Just double-wrap the bread (I use waxed paper for the first wrap, a sealable, re-usable freezer bag for the second, carefully squeezing out excess air.)
VARIATIONS I some times make burger buns with half the dough, they're more substantial than typical buns (that's a good thing) so I've learned to make them small-ish and flat-ish to hold a burger. And there's an Herb Bread version coming soon! So good!

ALANNA's TIPS
SAVING DISHES To save dishes, I use the same one-cup measure for the water, milk and the "add-ins".
SUGAR Some times I leave the sugar out, other times I use another sweetener like maple syrup or sorghum or coconut sugar. That said, sugar adds a nice color and a very slight underlying sweetness. Plus? It provides food for the yeast! The yeast will activate without sugar, it'll just take a little longer.
YEAST I recommend buying yeast in a jar, it's less expensive than buying it by the envelope. That said, I've written the recipe so it works with the 2-1/4 teaspoons of yeast in a standard yeast packet.
FLOUR This recipe calls for four cups of flour. I've settled on 3 cups of bread flour plus 1 cup of whole wheat as my favorite blend but have done as much as 2 cups of each. If you'd like to increase the whole grains, use 2 cups bread flour and 2 cups whole wheat; you will want to use three teaspoons yeast, the heavier flour needs an extra boost.
ADD-INS It's easy to have fun here! I never measure, just fill a one-cup measure (the same one used for the water and milk) to the top. My favorites are 1/4 cup old-fashioned oats, 1/4 cup sunflower seeds (total fave!) plus a half cup mix of ground flax, flax seeds, sesame seeds and wheat germ. I've also used chia seeds, cornmeal, buckwheat flour, chickpea flour – and would happily use any one of those again in small volumes. Dried fruit is good too. So are herbs!
UPDATE: SO YOU THINK YOU KNOW HOW TO KNEAD? Um, so did I, so did I. But when a brand-new bread baker was inspired to make My Easy Everyday Bread the very day the recipe went live, I recommended she take a quick kneading lesson and pointed her to this video from King Arthur Flour. Turns out, I needed the lesson myself! I'd been having trouble with the stickiness of this dough but just hoosiered through. With a "fold half, roll and quarter turn" method, the stickiness completely disappeared, the dough was wonderful in the hand. The loaves rose higher and the texture was especially nice, dense but moist. A bench knife/pastry scraper is still helpful during kneading but you'll need just a couple extra tablespoons of flour and your hands will be dusty with flour but not sticky with dough. Amazing. Yeah, watch the video!
Per Slice, assumes 24 (actual calories will vary based on add-ins and extra flour used): Calories; 119g Tot Fat; 0g Sat Fat; 1mg Cholesterol; 199mg Sodium; 20g Carb; 2g Fiber; 3g Sugar; 4g Protein.
WEIGHT WATCHERS Old Points 2 & PointsPlus 3 & SmartPoints 4 Clock Watch: Five Minutes to Mix the Dough


Left – Fearless Girl! Face the yeast, treat it gently, bread's in your future. To start, just sprinkle the yeast on top of 2 cups of tepid (not hot, not cold) liquid, the yeast will float on top.
Center – Gently stir the yeast into the liquid, wetting every bit. At first, the yeast will clump up in little yeast cliques.
Right – After a few minutes, while you're mixing the flours, the yeast will begin to come together into a single, unified friendship, experienced bread makers call this process "activating the yeast". You'll begin to see a few bubbles, it might even bubble up like a Yellowstone hot spring!


Left – Gather together the flours, preferably using a kitchen scale instead of measuring cups, you can pour the flour straight from the bag into the bowl!
Center – Don't forget the salt! It makes all the difference in the bread's flavor.
Right – Collect a cup of "add-ins" – old-fashioned oats, sunflower seeds, wheat germ, oat bran, sesame seeds, flax seeds, ground flax, chia, cornmeal, etc. – four or five different sizes and textures, totalling one cup, using the same measuring cup used for the hot water and cold milk.


Left – Before mixing the Flour Mixture and Yeast Mixture together, "borrow" about a half cup of the Flour Mixture to dust the kneading surface. With any luck, you'll need no additional flour for kneading.
Center – Then move the remaining Flour Mixture into the bowl of Yeast Mixture. Why not the other way around?
Right – Because you can then oil the bowl that held the Flour Mixture, no need to wash it first! This is the bowl in which the dough will do its First Rise.
Clock Watch: Ten Minutes to Knead the Dough


Left – mix the dough with a spoon in the bowl (it'll still be wet and sticky), then turn the whole mess onto the kneading surface that's been dusted with 1/2 cup of Flour Mixture
Center – once you begin to knead (be sure to watch the video from King Arthur Flour, link above), the dough will noticeably begin to take shape, becoming firm and almost puffy as the yeast begins to work and the gluten stretches, you can actually feel it happen, that's the great thing about kneading bread by hand, learning the "feel" of dough; a bench knife/pastry scraper is handy to keep on hand, also a few tablespoons of extra flour
Right – and then, voila, there it is, a beautiful round of bread dough, you made that yourself, Fearless Girl!


Left – roll the ball of dough in the oil, sliding it around the bowl to cover the entire inside of the bowl and the exterior of the dough
Center – cover the dough with a clean kitchen towel, be sure to cover all the corners of the bowl, no air inside, okay?
Right – find a warm place for the dough to rise, my current favorite is right under the under-cabinet light fixtures, I just need to stack some things underneath (a tray, the other bread bowl) to get it close enough to the lights. A heating pad works (Homemade Yeast Rolls), so does a finagled space heater (Armenian Easter Bread). In a warm place, the First Rise takes about two hours but it's best to judge judge by appearance than time. The cooler the place, the longer it will take; warmth just speeds up the First Rise, if there's no rush, there's no need to find a warm place, an open counter is just fine. In fact, you can also do the First Rise in the refrigerator, the covered dough can stay in the fridge overnight or all day (and even longer, should life intervene).
Clock Watch: Two Hours for the First Rise (photos in process!)
Clock Watch: After Shaping the Loaves, One Hour for Second Rise (photos in process!)
Clock Watch: Four Hours, Start to Finish, My Beautiful Easy Everyday Bread (photos in process!)
© Copyright 2017 Kitchen Parade


Thank you Alanna very much! I truly enjoy all your recipes!!! How would you change this recipe for the bread machine?
ReplyDeleteUnknown ~ You are so kind, thank you! I haven’t used a bread machine in many years but we’re both in luck because the inspiring recipe includes bread-machine instructions, it’s here Whole Grain Bread. Let me know how it goes!
ReplyDeleteAlanna,
ReplyDeleteYou have inspired me to make bread.
I have wanted to try for years, but have never made anything with yeast -- and so here we go. At days away from turning the page and celebrating turning 60 years young, I think this will be a new learning experience.
I love to cook -- and it's time to get over fear of baking bread!
Thank you and happy spring.
Pat ~ Oh my, such pressure! :-) Good luck, I’m so honored to be your inspiration! Let me know how it goes!
ReplyDeletePat ~ One thing you might check out is a good kneading video, I like this one by King Arthur. In fact, it has me re-thinking how I knead bread (something I learned at like age 10 or so) and how my sticky dough may be unnecessarily so. I’m baking a batch tomorrow, I think!
ReplyDeletePat ~ Either I forgot the link to King Arthur or the comment system won’t allow a link. Let’s try this again, King Arthur Flour.
ReplyDeleteFirst of all, this bread is delicious. I put the bread into two 9x5 loaf pans. I was expecting them to rise to at least close to the top of the pan after one hour, but they never did. I baked them per the instructions and then are still very flat - about 2-3" tall. Would they be better baked in a smaller loaf pan?
ReplyDeleteLucy ~ Hmmm, let me think. I always make free-form loaves so need to check, for sure. I’m making this bread again today so I’ll check on that for you.
ReplyDeleteThe thing with bread is, it’s not so much gauging when the dough is ready by time but by appearance. It’s possible that in your kitchen, the dough needed longer for its second rise. If your flat bread had a dense but not heavy crumb, then the pan size would be an issue. But if it’s dense and heavy, I suspect that it needed more time to rise in the pan. I know I’ve not yet finished the how-to photos (they take forever!) but what you’re shooting for is a full, fat loaf that looks all light and airy before it goes into the oven. Hope this helps, I’m so glad you asked and wish I could just pop into your kitchen to see what’s going on!
Lucy ~ Just put two loaves of bread in the oven, that rules out the pan size question. (And at first, I really did wonder because I found three sizes of loaf pans in the cupboard and for a second wondered if I’d only used the medium-size loaf pan by accident. Nope, twas the big one, the 9x5 typical bread loaf pan.
ReplyDeleteSo, what else?
Did you measure the flour by weight or volume? My experience is that measuring by volume usually means using 25% more flour. that would make the dough “heavier” than it should be.
Did you happen to use more than one cup of whole wheat flour? If so, that too would make the dough relatively heavier. (You can compensate for these with yeast or time or both but that’s not your question.)
Is your yeast fresh, did it “proof” with bubbles when it was mixed with the water/milk/sugar?
My suspicion, though, is that the dough simply needed more time to rise, it should definitely rise up to the top of the loaf pan.
Keep me posted on what you think, I’d love to get you the wonderful loaves that this recipe can make!